How to create new *.tapf Profile by Profiler
You can create *.tapf Profile by profiling real tube amplifier or combo amplifier, or software guitar processor. To do this:
- 1. Select Tools->Profiler.
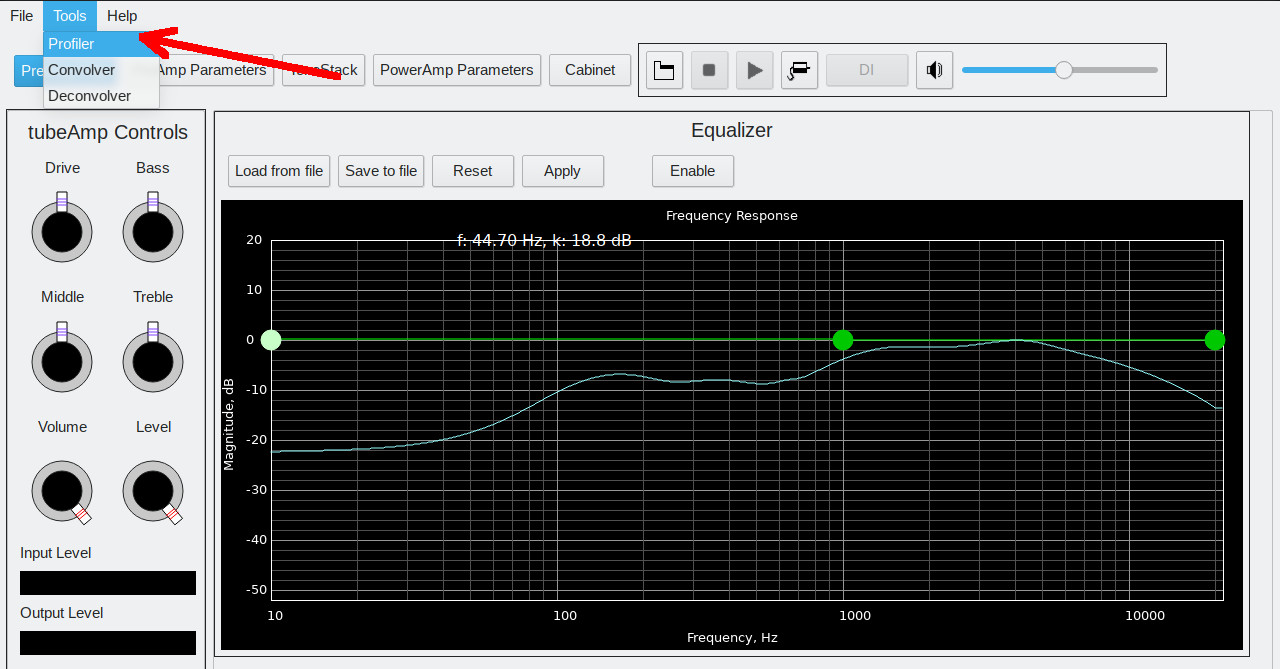
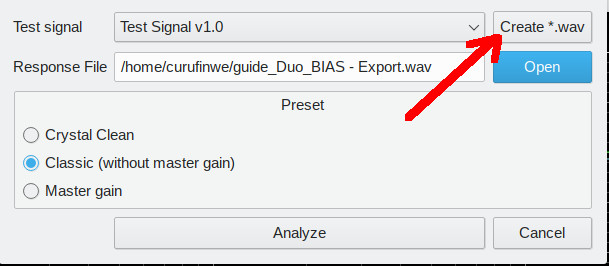
- 2. Create test signal .wav file. Press **Create .wav, save it under any name, let it be test_guide.wav**.
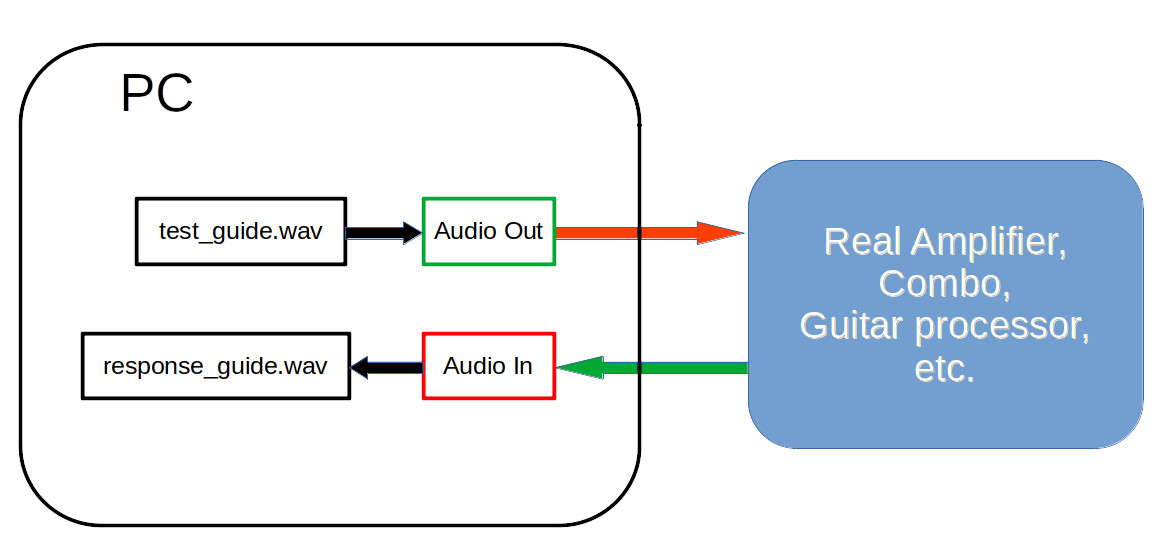
3. Now the test signal must be passed through the profiled amplifier. It can be real tube amplifier or software guitar processor like BIAS, Amplitube, or spiceAmp.
Connect the cable from the audio card output to the guitar input of the amplifier, connect the guitar microphone to the audio card input.
Adjust output volume to achieve gain level like 1970’s classic hard rock - this is optimal level for the Profiler. You also can take crystal clean, fully undistorted sound if you use Crystal Clean preset at the Step 5 of this Guide.
Start playback of the test signal and record response from the microphone to the response_guide_unaligned.wav file.
In the case of software guitar processor load test signal file into DAW or processor player and render processed output to the response_guide_unaligned.wav file.
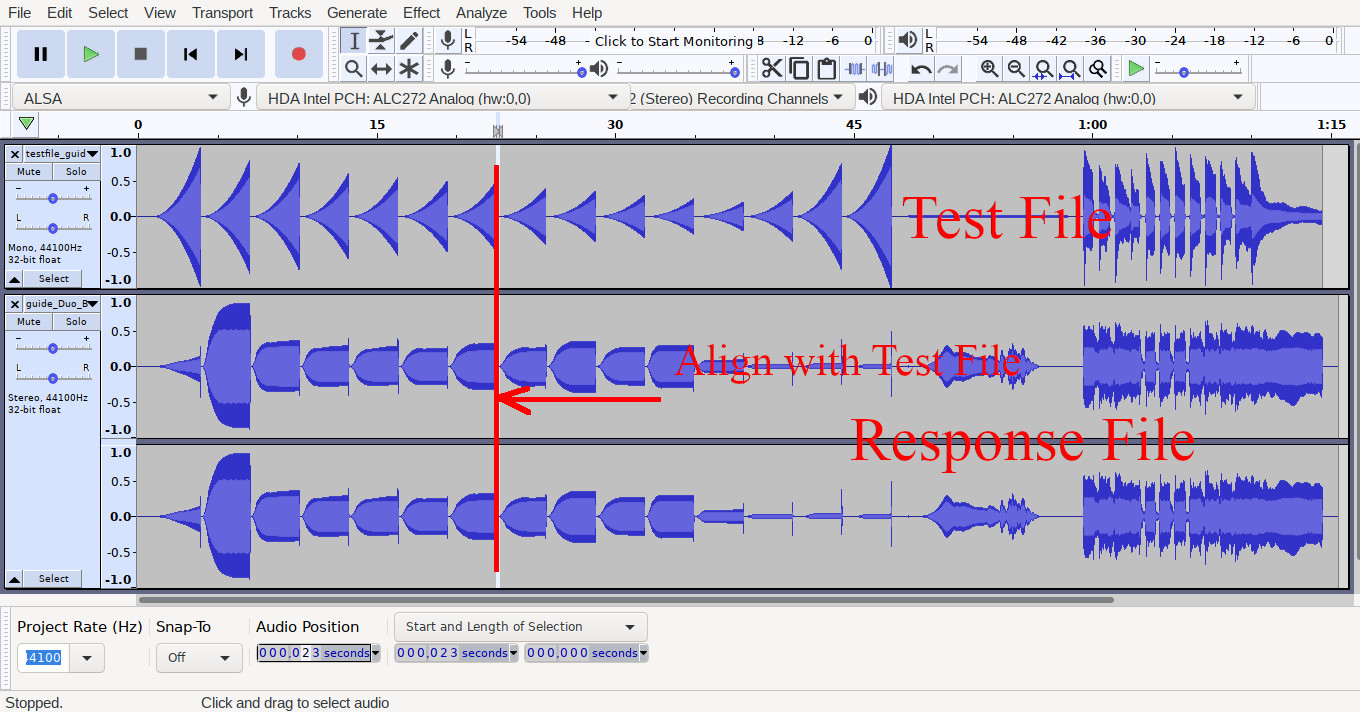
4. VERY IMPORTANT! Now response signal must be manually aligned with the test signal. You can use any DAW or audio editor to do this. I would recommend Audacity. Export aligned result to response_guide.wav file.
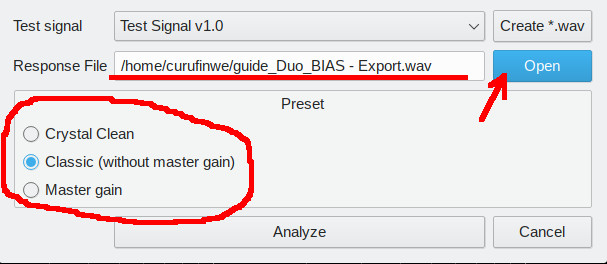
- 5. Open aligned response file response_guide.wav in Profiler dialog of the tubeAmp Designer. Select Preset. Prefer Classic setting here. Select Crystal Clean if you got crystal clean sound at the Step 3. Select Master gain if you create high-gain, metal sound. Press Analyze and wait. Profile will be automatically created and applied to the Processor of the tubeAmp Designer.
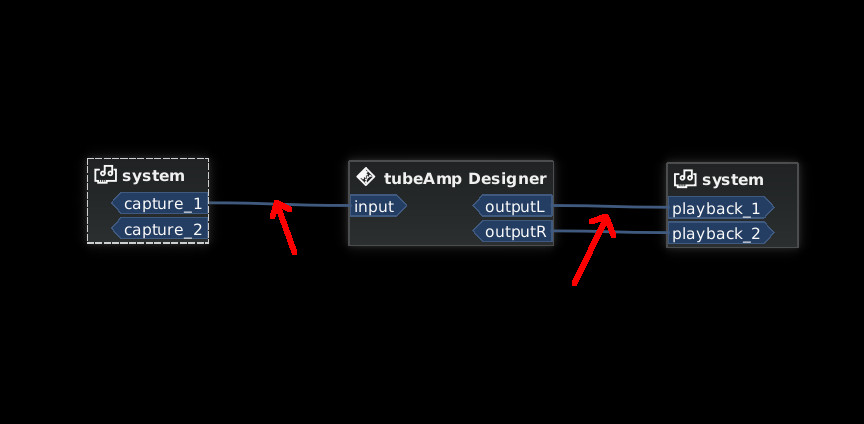
- 6. Make JACK connections of the input and output ports of the tubeAmp Designer. In Cadence suite it will look like this:
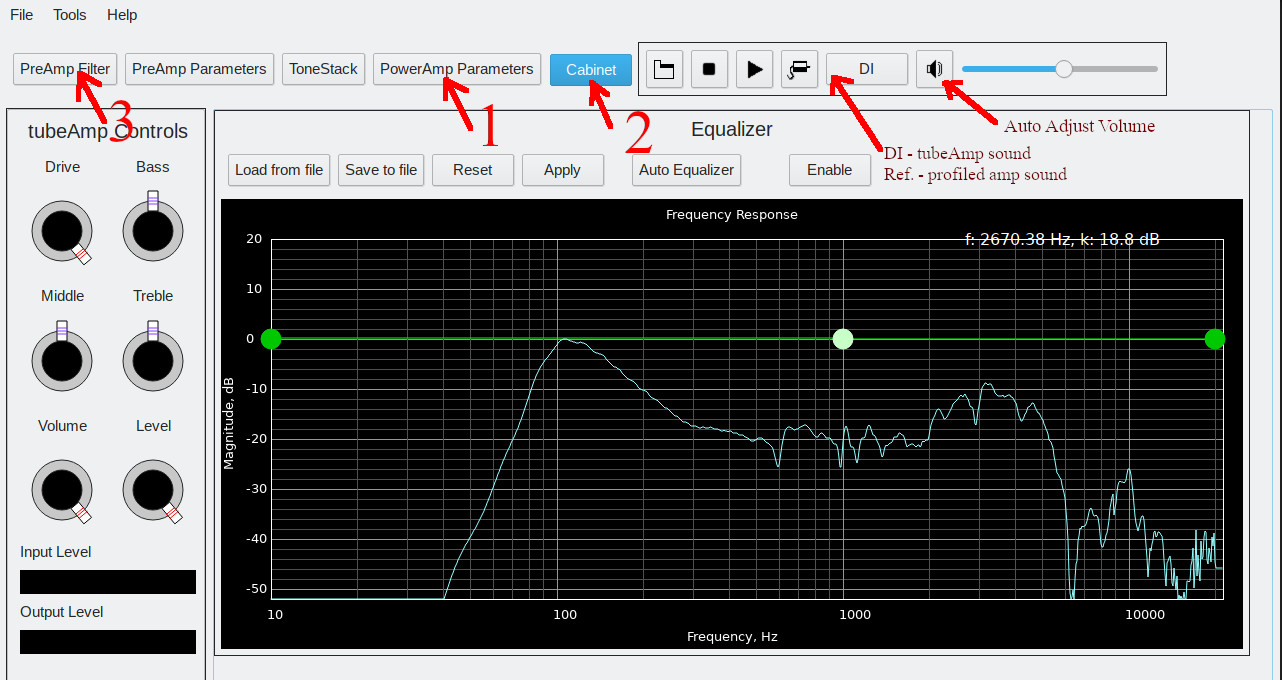
7. Check and manually correct created Profile. DI guitar sound from the test_guide.wav and response to it from the response_guide.wav are sended to the Player of the tubeAmp Designer. Now you can play them both and check how close created Profile is to the real profiled amplifier sound. Switch between Real amplifier / tubeAmp sound pressing DI/Ref. button.
I recommend making manual adjustments in this order. After making any adjustments remember to press Auto Adjust Volume button!:
7.1 Adjust PowerAmp Parameters -> Gain Level. Automatically, the gain may not be set exactly, adjust it by sound.
7.2 If needed, adjust Cabinet equalizer. Start with adjusting 2000 - 3000 Hz range.
7.3 Only if it is really needed adjust PreAmp Filter equalizer. Here - start with adjusting 400 - 600 Hz range.
7.4 Only if it is really needed adjust PowerAmp Parameters (for Classic preset) or PreAmp Parameters (for Master gain preset).
8. Save your profile when you have achieved an identical sound to the real profiled amplifier. Now this profile “*.tapf” file can be used in tubeAmp plugin from KPP or in tubeAmp Designer.
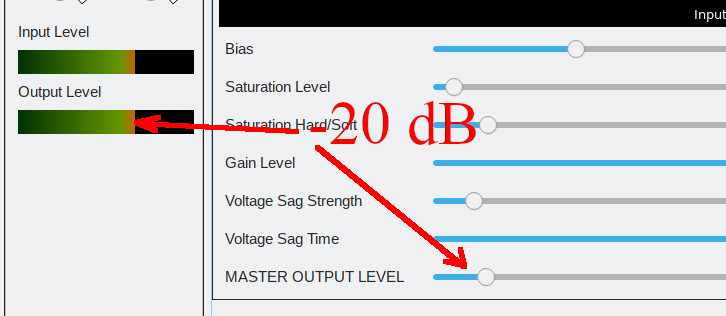
- 9. Adjust PowerAmp Parameters -> MASTER OUTPUT LEVEL until the Output Level on the scale is -20 dB. The indicator has no numeric scale so simply do as shown in the picture :)
